Configure policies

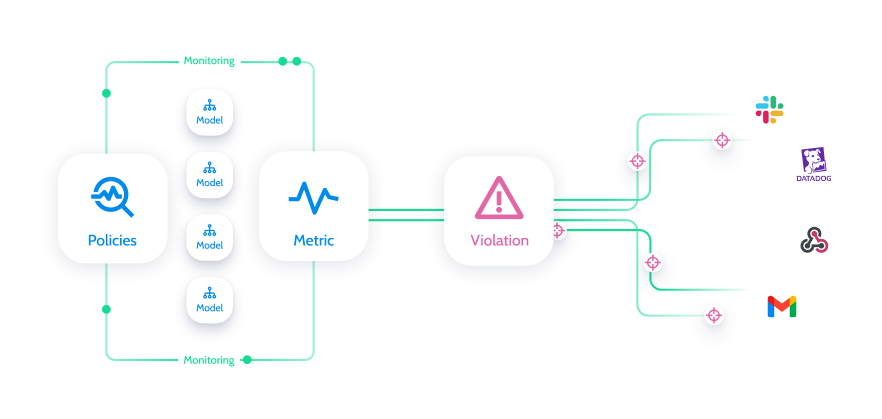
Policies flow
Step 1: Create a policy
Start by opening the policy builder to begin the process. This can be done from the Models screen > Project actions (top-right) > New policy or from the Policies screen > New policy (top-right).

Create a policy
Step 2: Set a scope

Policy scope
You can build a logical combination by formulating it as a sentence in the scope section.
“I want to monitor {metric} in {entities} on {models} across {segments}”
- Metric - Each policy can be configured on one metric.
- Entities - One or more entities (e.g., features, predictions, prediction confidence, etc.) on which the selected metric will be monitored.
- Models - One or more models on which the policy will run. If you select “All models,” this policy will automatically be applied to any new model that will be added to the project in the future.
- Segments - The granularity level at which the policy will scan for anomalies. This can be either the entire set or at the segment level, or both. If you've selected segments, then any newly added segments in the future will be included in the policy.
Let's look at an example where I want to monitor whether the minimum value on the feature “age” goes below “0” on all models in the project:
Metric - “Min value.”
Entity - “Age.”
Plesae note that if you haven't used the match entities capability, you will need to manually select all the features named “Age” within the drop-down list to monitor all of them.
Models - “All models.”
Segments - "Entire set" is appropriate here because it's not an issue related to a specific segment.
Step 3: Configure condition / trigger
This step controls when a behavioral change will be categorized as an anomaly.
First, we need to set and define the control limits.
- Fixed - When there's a known (and stable) static value above/below which you want to be alerted.
Note that this value will be the same for all entities selected in the scope section. - Dynamic - Based on Superwise's time series anomaly detection algorithm, the policy can automatically determine the threshold based on two things:
- The sensitivity level you defined (see threshold sensitivity).
- The normal period settings indicating how far back in time Superwise should look to determine the control limits. For example, when looking at vaccination rates, data before January 2019 isn't relevant anymore due to COVID implications.
Once selected, you'll be able to configure a sentence-based threshold.
- Fixed: "Trigger an alert when values are {above/below} {Value} for at least {number} consecutive days in a row"

* Above/below/out-of-range - Define the control limit boundary direction for anomaly detection.
* Value - Either a percentage or number above/below which the metric will trigger an anomaly.
- Dynamic: “Trigger anomaly when metric is above the expected values, based on historical data since all time” (The sentence appears that way by default.)

* Above/below/both: Define the control limit boundary direction for anomaly detection.
* Normal period - How far back in time should Superwise look in order to determine the control limits
    * All time (since the model's data started flowing into Superwise).
    * Starting from a specific date - which will open a date picker.
* See Advanced for more settings.
Step 4: Schedule and set alerting
This is the last part, where you define when the policy should scan your model's data (frequency) and how you want to get alerted in case of an incident. To determine when to scan what, you need to build a logical sentence from the following:
- “Scan every {Day/Week on day} at {Time} the data of {Number} days ago”
- Day/Week on day - This depends on the frequency of the data being logged into Superwise and the granularity level that interests you. Most use cases are daily.
- Time - When the policy should scan the data depends on when you log the data to Superwise. It's very important for the policy to scan days of data when they are all logged into the system; otherwise, it will scan partial data.
- Number (of days ago) - If you send data using a delay (for example, labels or just input that takes time to log into Superwise), you want the scan to happen only after all the data is logged. This is where you define the delay. If you monitor performance and labels arrive only after 2 weeks, you should set this to 14 or more.
- Notification channels - Select which channels you want the alert to be sent to when an incident is created.

Notification channels
Advanced sensitivity/threshold control
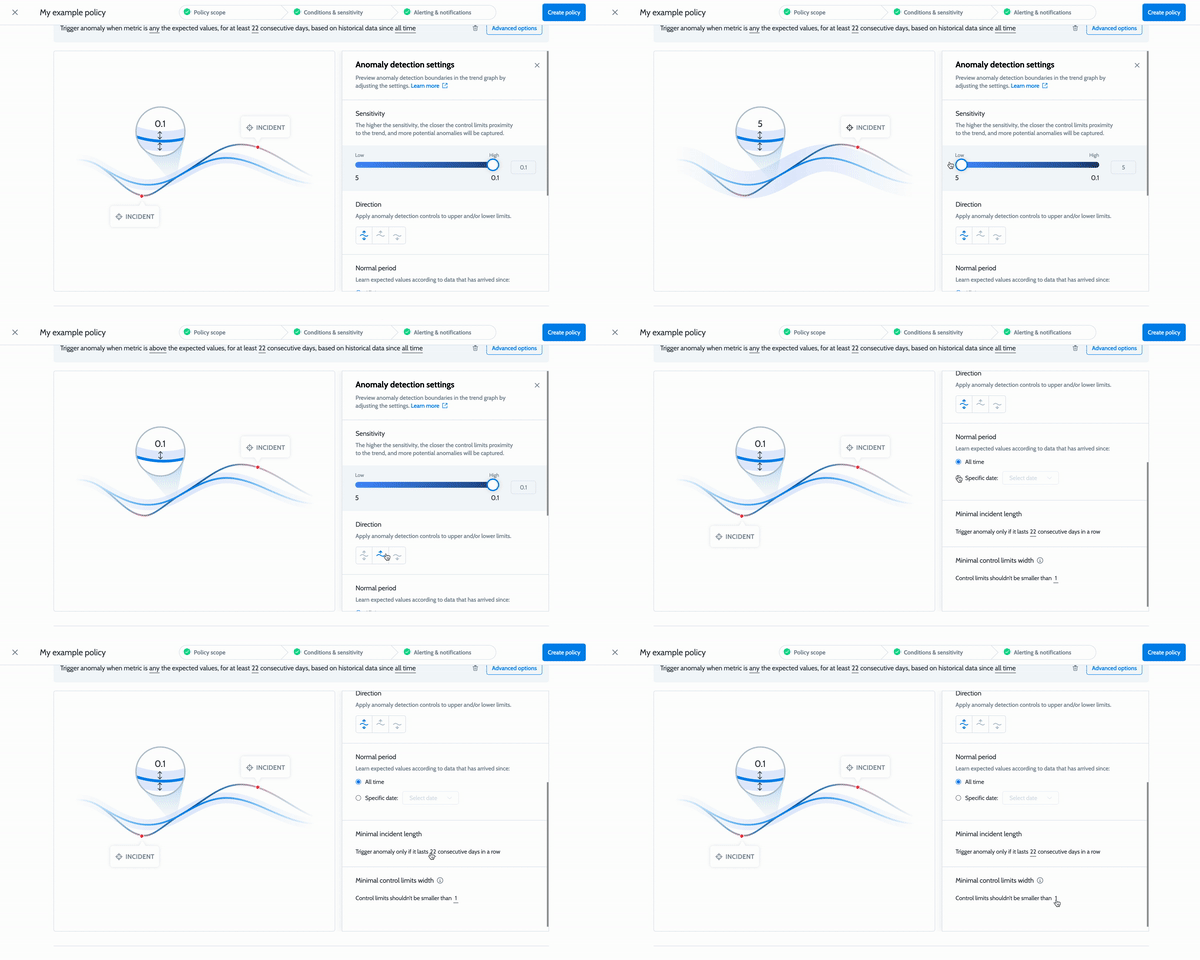
When configuring the dynamic threshold, you can click Advanced (to the right of the sentence), which will open a slider with additional settings.
- Sensitivity - Our anomaly detection is based on a multiplier of a factor with a standard deviation formula that takes seasonality into account. The default threshold uses 1 as the factor that multiplies that SD. You can set this factor to be anything between 0.1 and 5, where 0.1 is very sensitive; 5 is very tolerant.
- Minimal incident length - How long should an anomaly last for an alert to be generated?

Edit/delete/run policy
In the policy table, you can click More actions, at the right side of the policy row in the table, where you will find 3 options:
- Edit - Opens the policy builder in edit mode so you can change any of the policy properties, except the metric. Monitoring a different metric will require you to create a new policy.
- Delete - Deletes the policy and all its open/resolved incidents.
- Run now - Triggers the policy to run on all data available until today, regardless of the scheduling definition of this policy. This won’t affect the next run of the policy, which will take place according to the definition.
Creating alerting/notification channel
If you are interested in adding a new integration channel when the policy is already created, click +Add new integration channel in the Channel dropdown. Then follow the steps according to the desired channel type.
Updated over 2 years ago
