Collecting data from S3
This guide will cover all the steps required to build a fully integrated pipeline with Superwise using AWS S3 and AWS Lambda function.
Steps
- Create a private ECR repository.
- Upload the Superwise Lambda public container image to the ECR repository.
- Create and configure a Lambda function with the private image.
- Configure the S3 bucket to trigger the Lambda when a file is uploaded.
That's it! Now you are integrated with Superwise!
Overview of the integration process.
The AWS Lambda function is triggered by the "All object create events" event in your S3 bucket and downloads the uploaded file. After the Lambda function finishes downloading the file, the Lambda function sends the downloaded file to Superwise.
Diagram of the integration process.
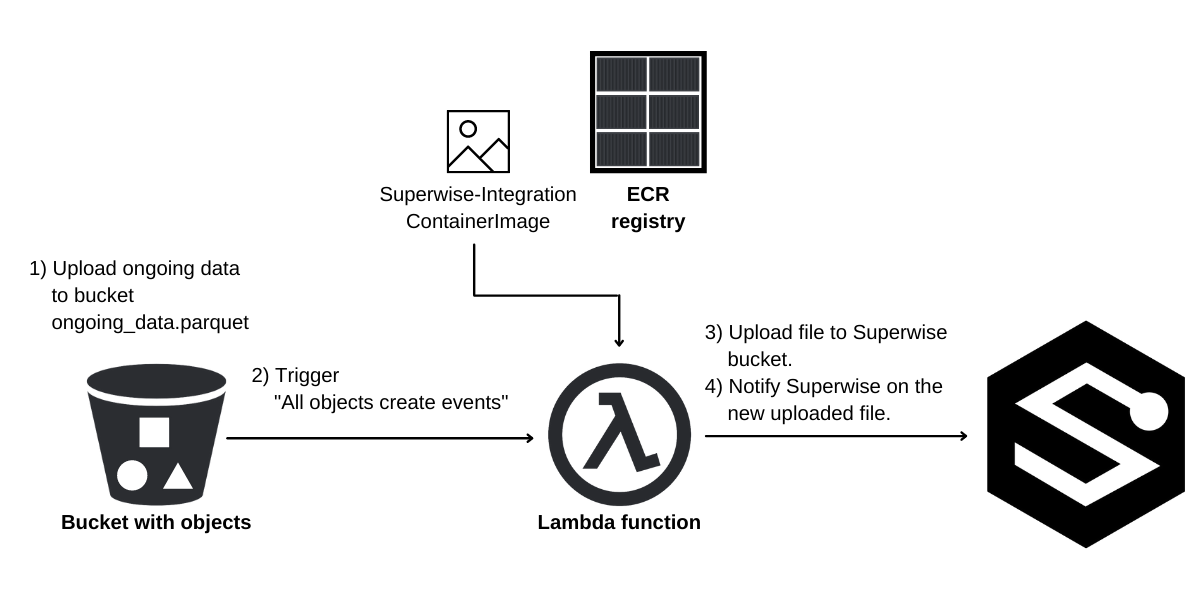
Integration Process Diagram
The AWS Lambda we will be creating will be based on the container image.
Currently, AWS only supports private container images for Lambda functions.
So we will upload the Superwise Lambda image to an internal AWS Container Registry (ECR).
Let's start the integration process
1. Creating an ECR Repository
Important Note
S3 Bucket, ECR Private Repository, and Lambda should be in the same region according to S3 support.
Use the AWS Dashboard
In the ECR dashboard, click Create Repository.
In the Create Repository form, make sure the repository is private and name it superwise-lambda.
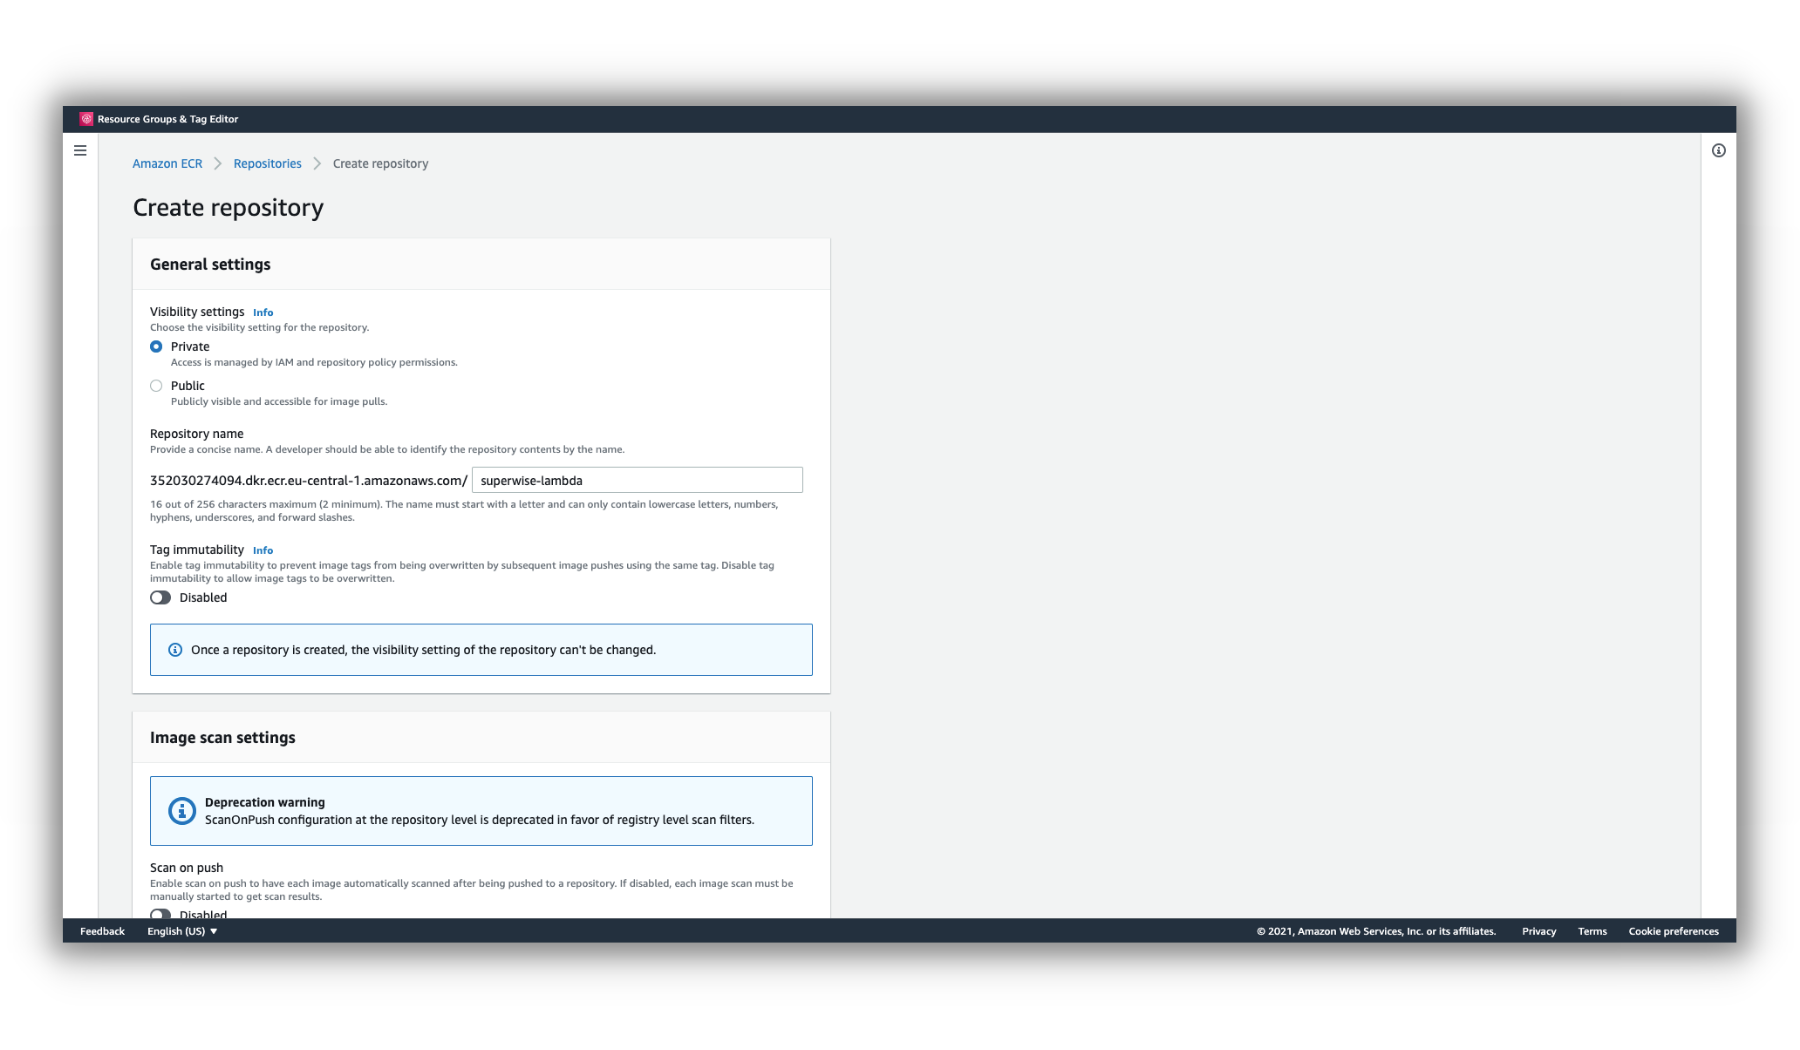
Create ECR
Use AWS CLI:
aws ecr create-repository --repository-name superwise-lambda --region eu-central-1
2. Upload the Superwise Lambda container image into the private ECR
Now that we have created our repository, let's push the public superwise-lambda container image to your private repository:
Use AWS CLI
aws ecr-public get-login-password --region us-east-1 | docker login --username AWS --password-stdin public.ecr.aws

docker pull public.ecr.aws/b9o6d1l3/superwise-lambda:latest

aws ecr get-login-password --region eu-central-1 | docker login --username AWS --password-stdin <ID>.dkr.ecr.eu-central-1.amazonaws.com

docker tag public.ecr.aws/b9o6d1l3/superwise-lambda:latest <ID>.dkr.ecr.eu-central-1.amazonaws.com/superwise-lambda:latest

docker push <ID>.dkr.ecr.eu-central-1.amazonaws.com/superwise-lambda:latest
Note
Replace the ID with your ECR ID
3. Create Superwise Lambda function
In this step, we will create our Lambda function that will fire on an upload event to the S3 bucket.
Use the AWS Dashboard.
Before creating the function, we should have an IAM role with the policies [AmazonS3ReadOnlyAccess, AWSLambdaBasicExecutionRole].
If you already have an IAM role, skip creating the lambda function.
For creating the IAM role, go to the IAM role dashboard and click create the role.
Then add the AmazonS3ReadOnlyAccess and AWSLambdaBasicExecutionRole policies and create the role.
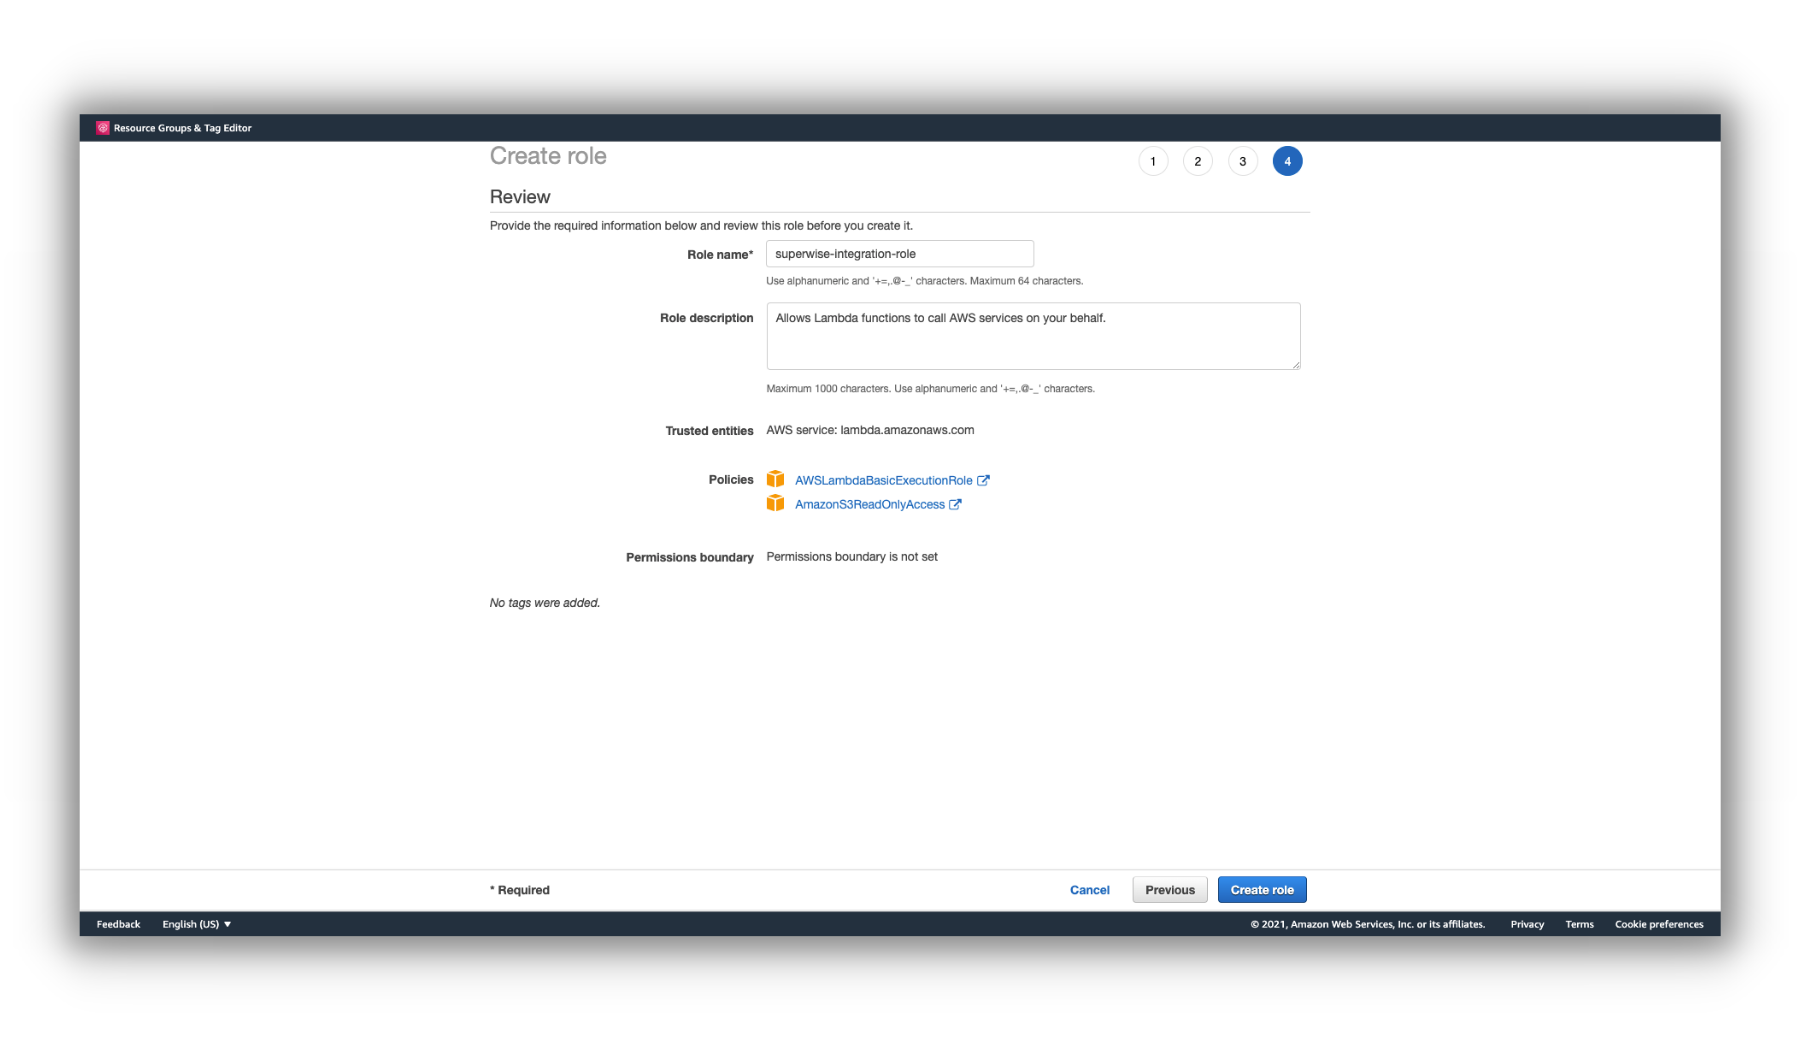
IAM role
Go to the AWS Lambda Dashboard and click on Create Function.
In the options to create your function form, select Container-image.
Then in the base form, make sure you select the Superwise Lambda container image in the URI image.
And click Create Function to create the function.
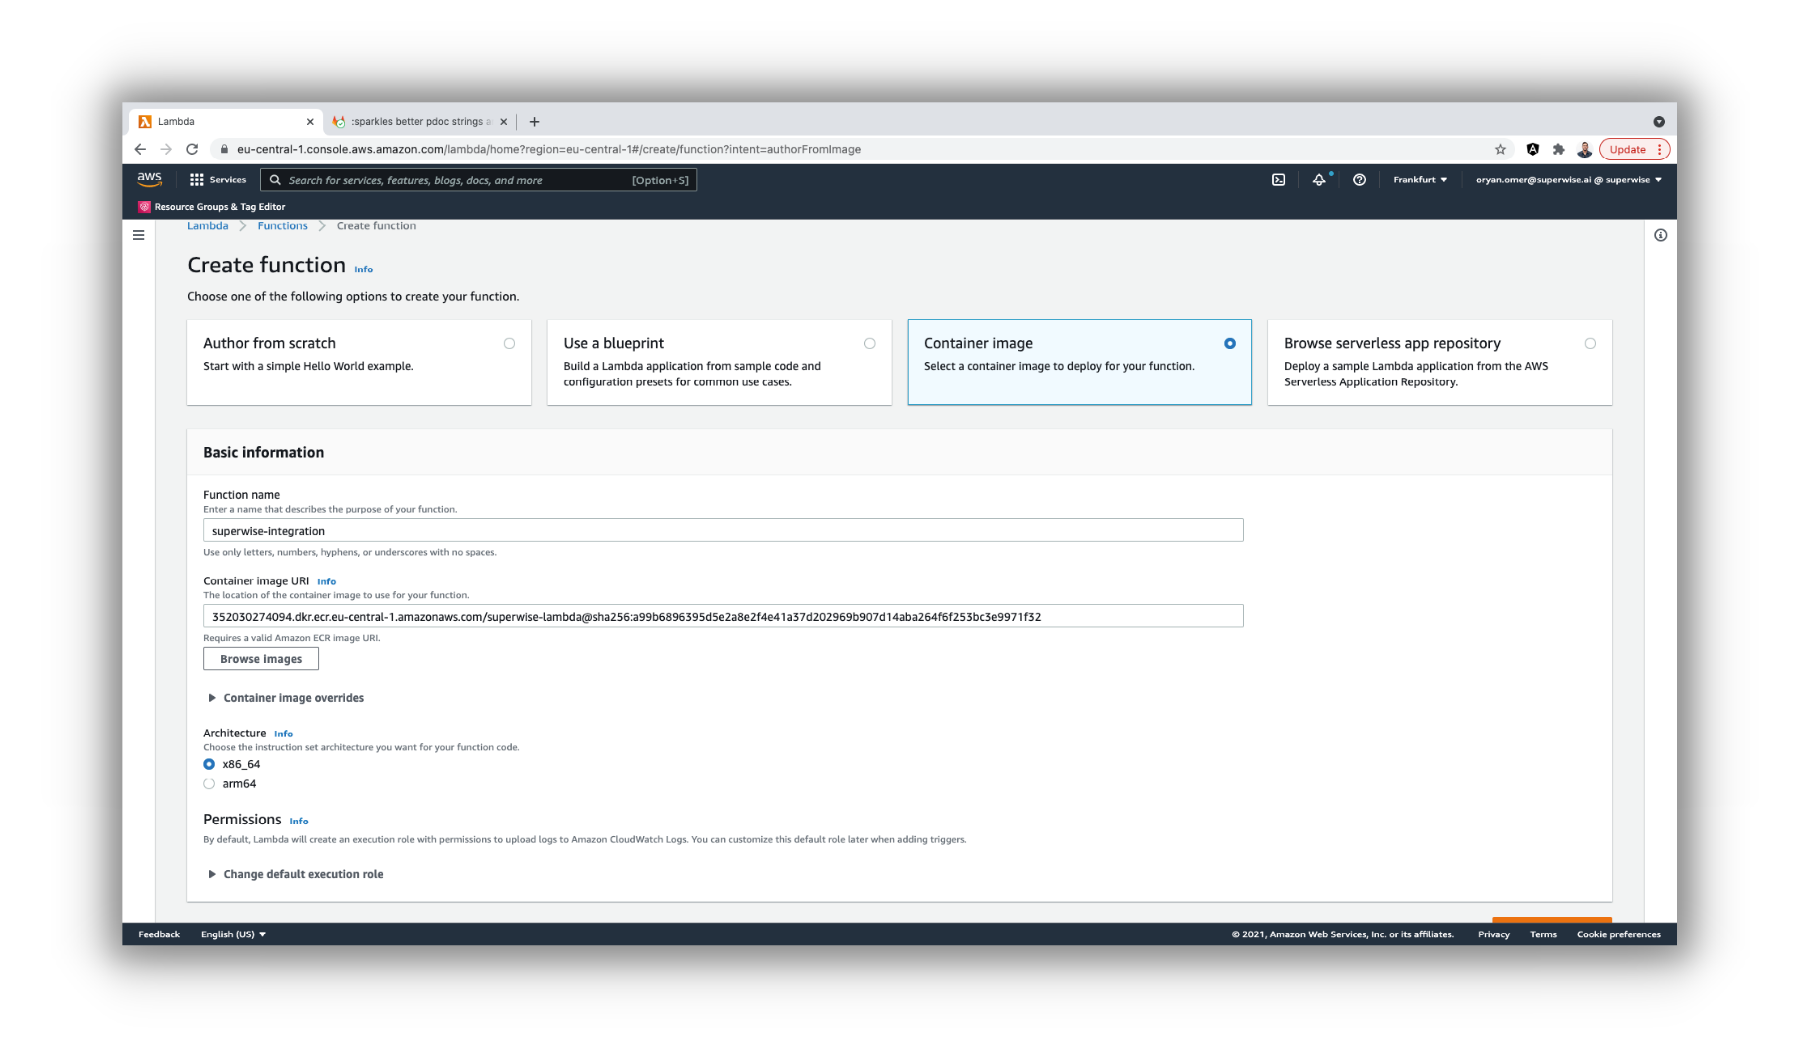
Create Function
Important Note
In the Permissions section, please ensure that the selected IAM role has at least the following permission:
- AmazonS3ReadOnlyAccess
- AWSLambdaBasicExecutionRole
After creating the Lambda function, we'll configure the environment variables for our Lambda environment.
Go to the Configuration tab within the Superwise integration function and select Environment Variables.
Then, click on edit and add the following variables:
- SUPERWISE_CLIENT_ID
- SUPERWISE_SECRET
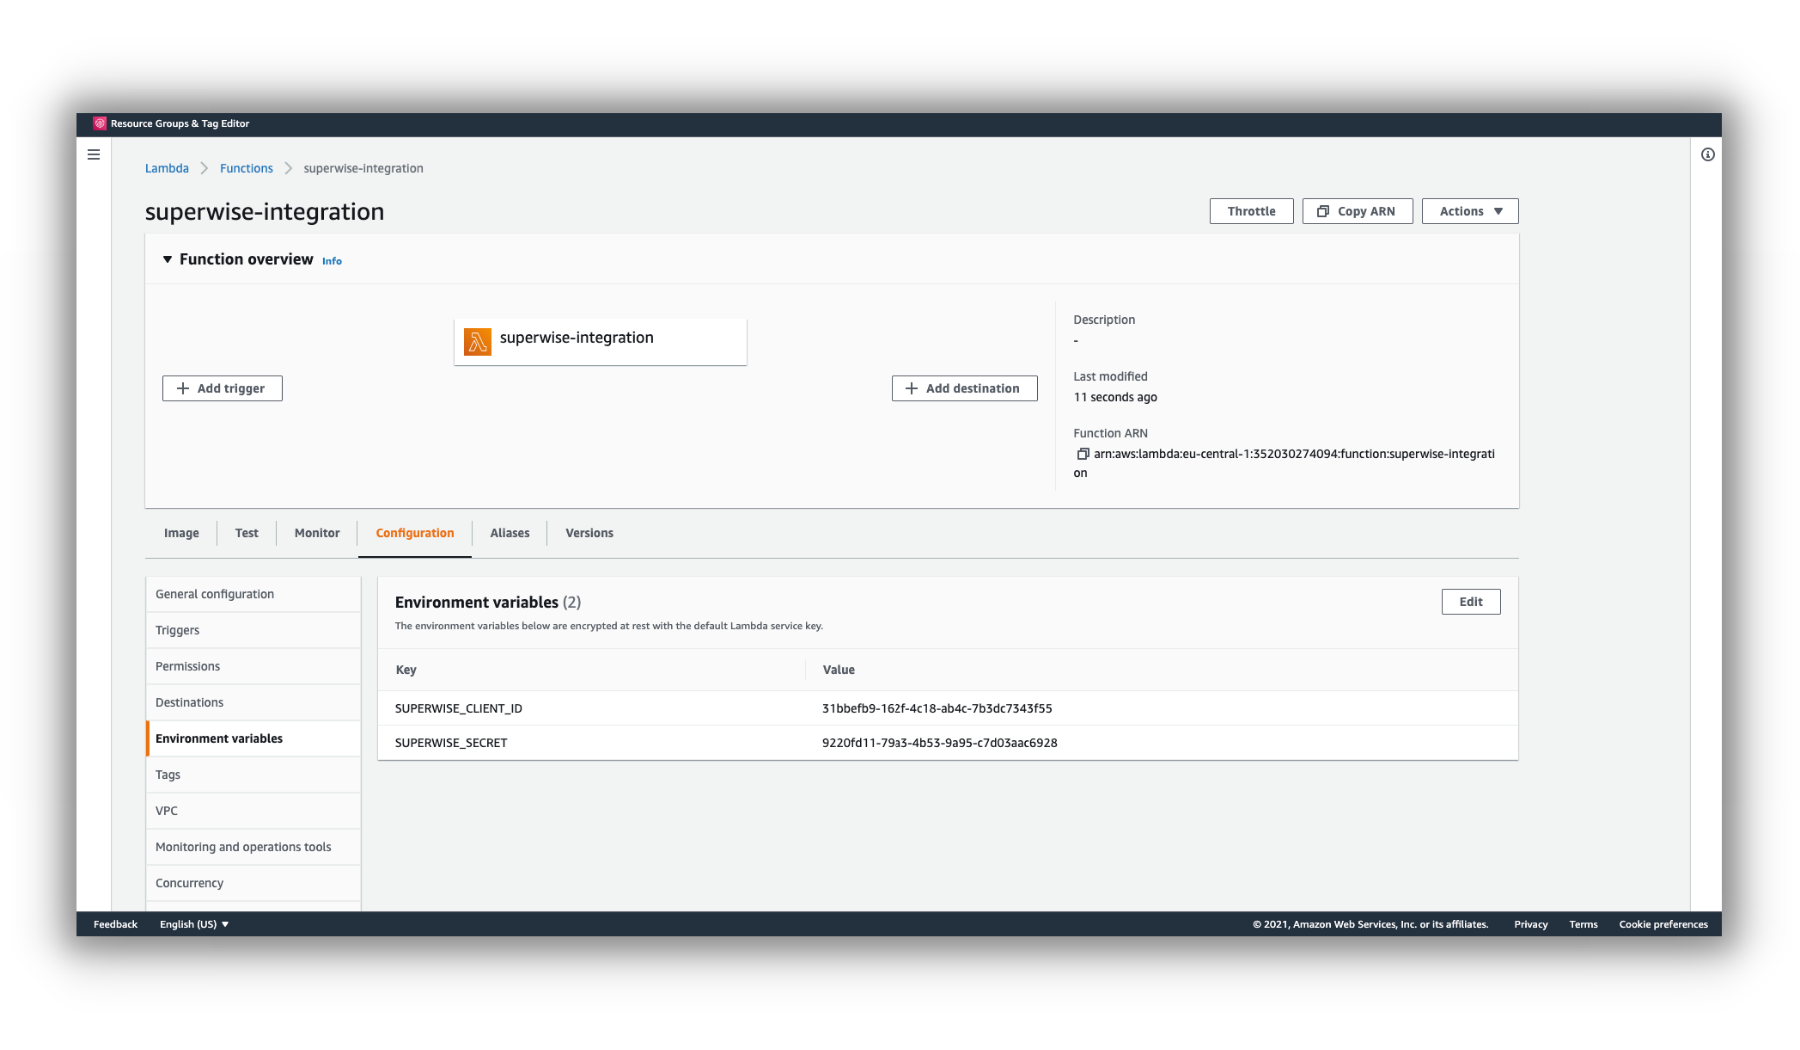
Lambda Environment Variables
Note
These variables will help us identify you within the Superwise platform.
For more information about Superwise clients and secrets.
Use AWS CLI
Here we will create an IAM role with the policies AWSLambdaBasicExecutionRole and AmazonS3ReadOnlyAcces).
aws iam create-role --role-name superwise-ex-lambda --assume-role-policy-document '{"Version": "2012-10-17","Statement": [{ "Effect": "Allow", "Principal": {"Service": "lambda.amazonaws.com"}, "Action": "sts:AssumeRole"}]}'
aws iam attach-role-policy --role-name superwise-ex-lambda --policy-arn arn:aws:iam::aws:policy/service-role/AWSLambdaBasicExecutionRole
aws iam attach-role-policy --role-name superwise-ex-lambda --policy-arn arn:aws:iam::aws:policy/AmazonS3ReadOnlyAccess
Then, we'll create the Superwise lambda with the role just created.
aws lambda create-function --region eu-central-1 --function-name superwise-integration \
    --package-type Image  --memory-size 1024 --timeout 60 \
    --role '<ROLE ARN>' \
    --code ImageUri='<REPOSITORY ID>.dkr.ecr.eu-central-1.amazonaws.com/superwise-lambda:latest'   \
    --environment '{ "Variables" : {"SUPERWISE_CLIENT_ID" : "<SUPERWISE CLIENT ID>" ,"SUPERWISE_SECRET": "<SUPERWISE SECRET>"}}'
Note
Fill in you Superwise Lambda URI, superwise-ex-lambda Role Arn, and Superwise Access and Secret.
4. Config S3 bucket to trigger the Lambda.
After creating the Superwise integration function, we'll configure the function to fire on an event from an Object created in our target S3 bucket.
Within our Lambda function, click the Add Trigger button.
Then select the option to create an S3 trigger and enter the name of your bucket.
Make sure the event type is "All object create events" and click Add.
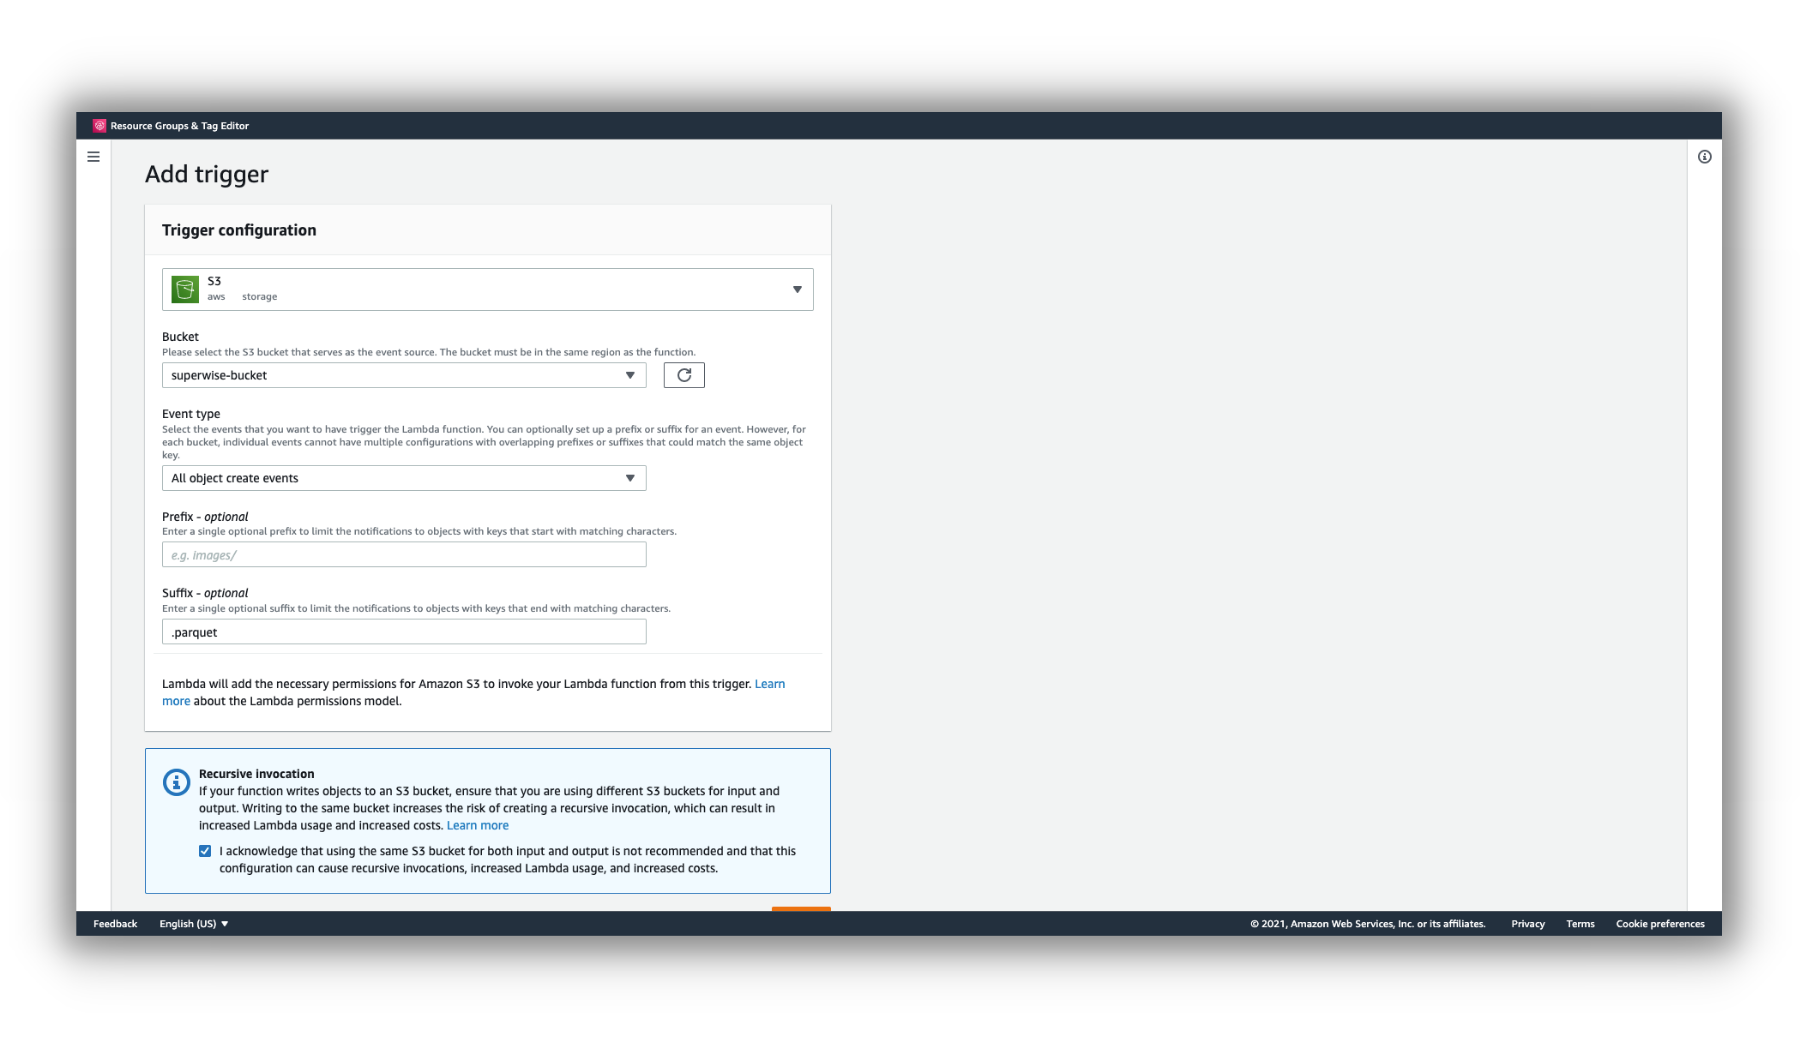
S3 Trigger
Use AWS CLI
If you don't have an S3 bucket, run the following command:
aws s3api create-bucket --bucket superwise-bucket --region eu-central-1 --create-bucket-configuration LocationConstraint=eu-central-1
Then run the commands to create the permission for the S3 bucket to invoke the Lambda and create the notification configuration between the S3 bucket and the Lambda:
aws lambda add-permission --function-name superwise-integration \
--region eu-central-1 \
--action lambda:InvokeFunction \
--principal s3.amazonaws.com \
--source-arn 'arn:aws:s3:::superwise-bucket' \
--statement-id 1


aws s3api put-bucket-notification-configuration --region eu-central-1 \
--bucket superwise-bucket \
--notification-configuration '{"LambdaFunctionConfigurations": [{"Id": "superwise-lambda-function-s3-event-configuration","LambdaFunctionArn": "<LAMBDA ARN>","Events": [ "s3:ObjectCreated:*" ],"Filter": {"Key": {"FilterRules": [{"Name": "suffix","Value": "<Files Extenstions>"}]}}}]}'
Note
Files extensions are used to upload only the file with the specific extension.
Replace File extension with your file extensions. e.g.: .parquet
You're integrated!
Updated over 3 years ago
