SSO configuration
Single Sign-On allows users to login without having to create a new username and password just for your application. Instead, users login with their SAML or OpenID Connect credentials. SAML and OpenID Connect help manage and authenticate a single user across multiple applications. Here are guides to help you implement SSO.

Admin role required
To configure SSO you need to have an admin role in the platform
SAML configuration
Step 1 - Claim your domain
Once you are logged in into the platform, open the Admin Portal and navigate to SSO page.
In the Claim Domain window please enter your domain name and create DNS record with the following values (marked in red)
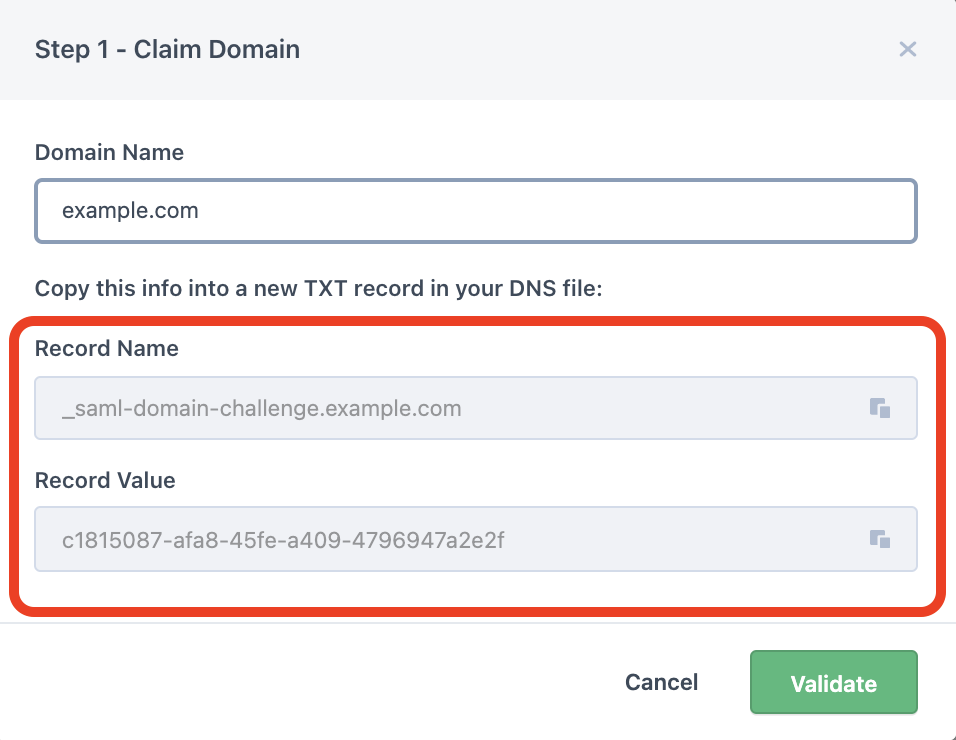

In the Claim Domain window please enter your domain name and create DNS record with the following values (marked in red):
Step 2 - Configure your IDP
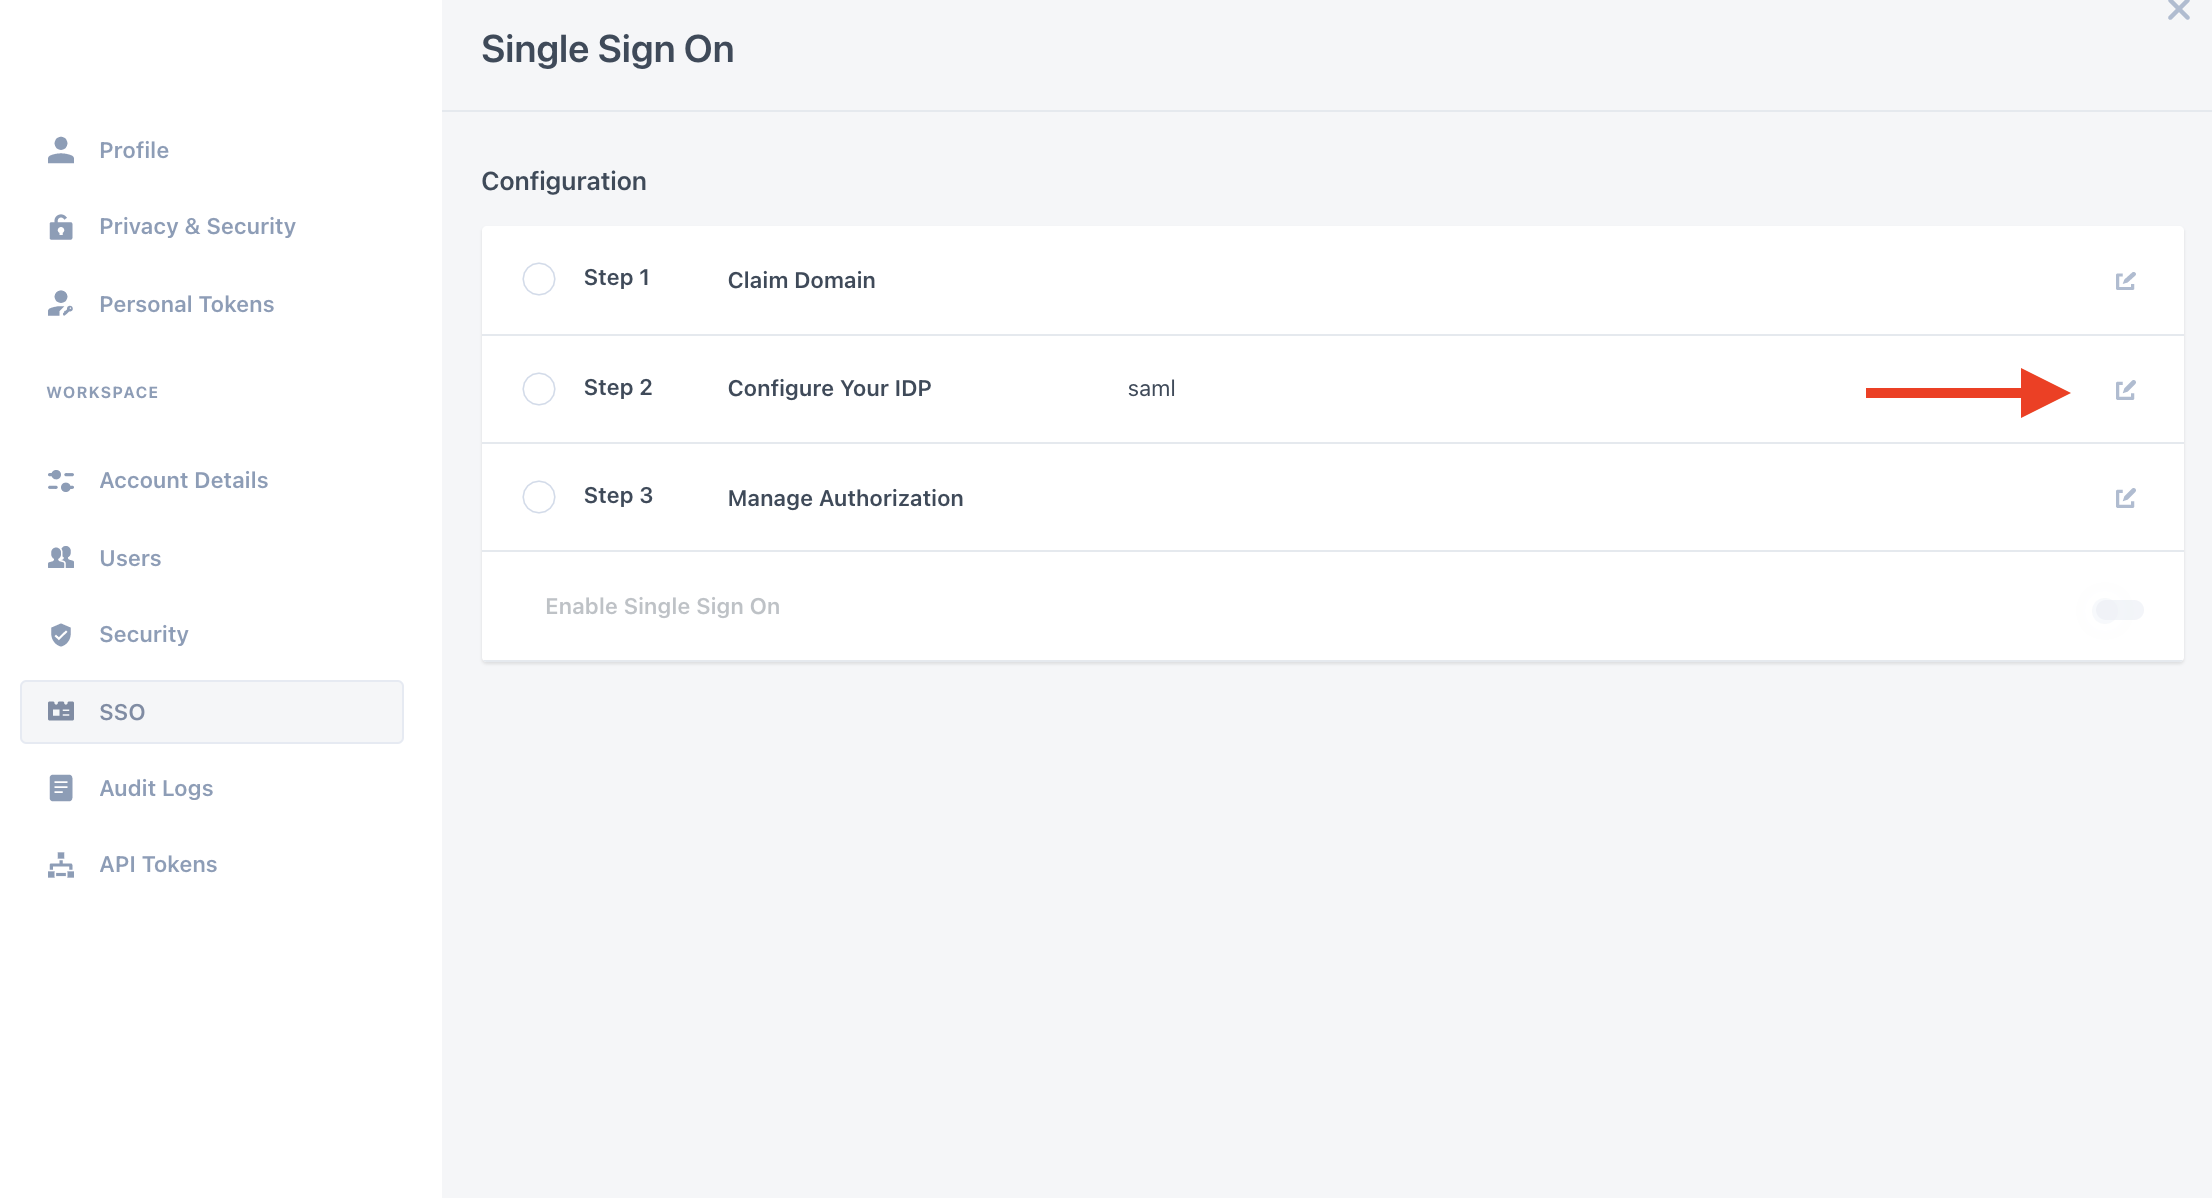
- Click the edit button next to the Configure your IDP step
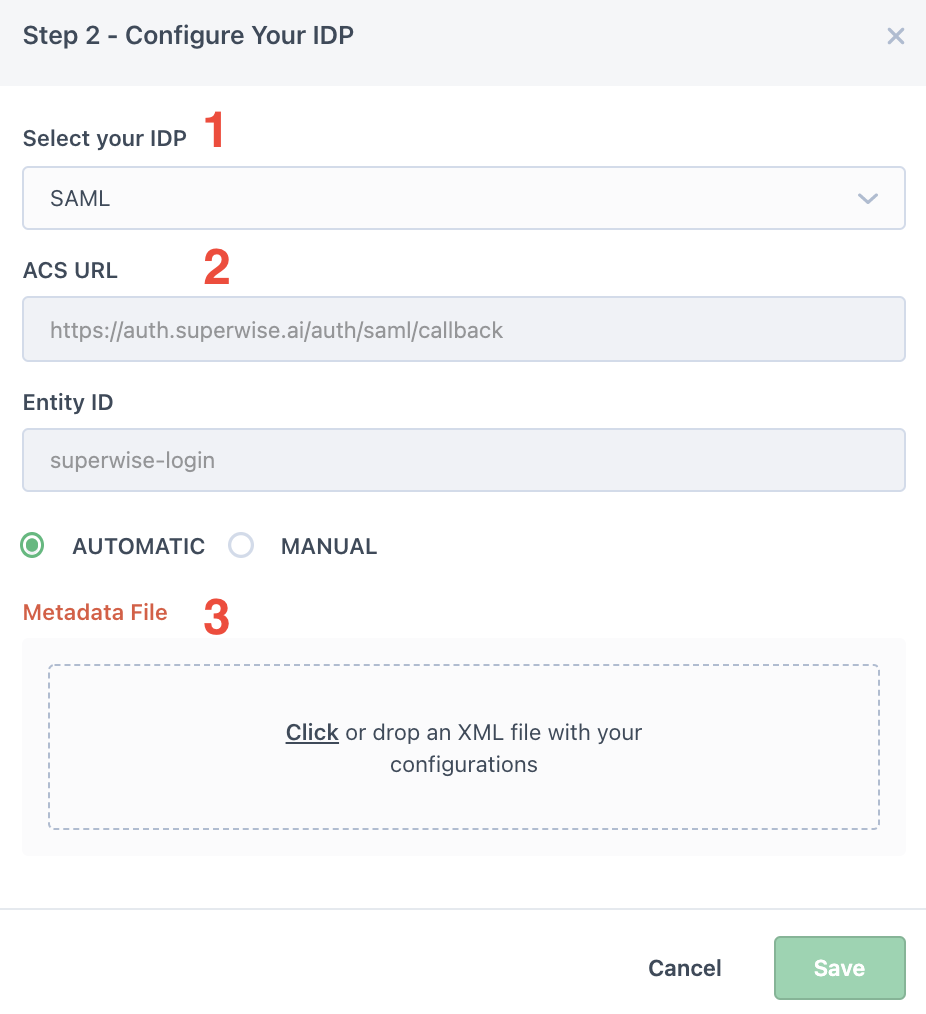
- In the Configure Your IDP window please perform the following:
- Select SAML
- Copy the ACS URL to your SAML application (to see where please look in Step #3).
- You will need to import an XML file with your SSO endpoint and public certificate (see the following steps for further information on how to extract this file)
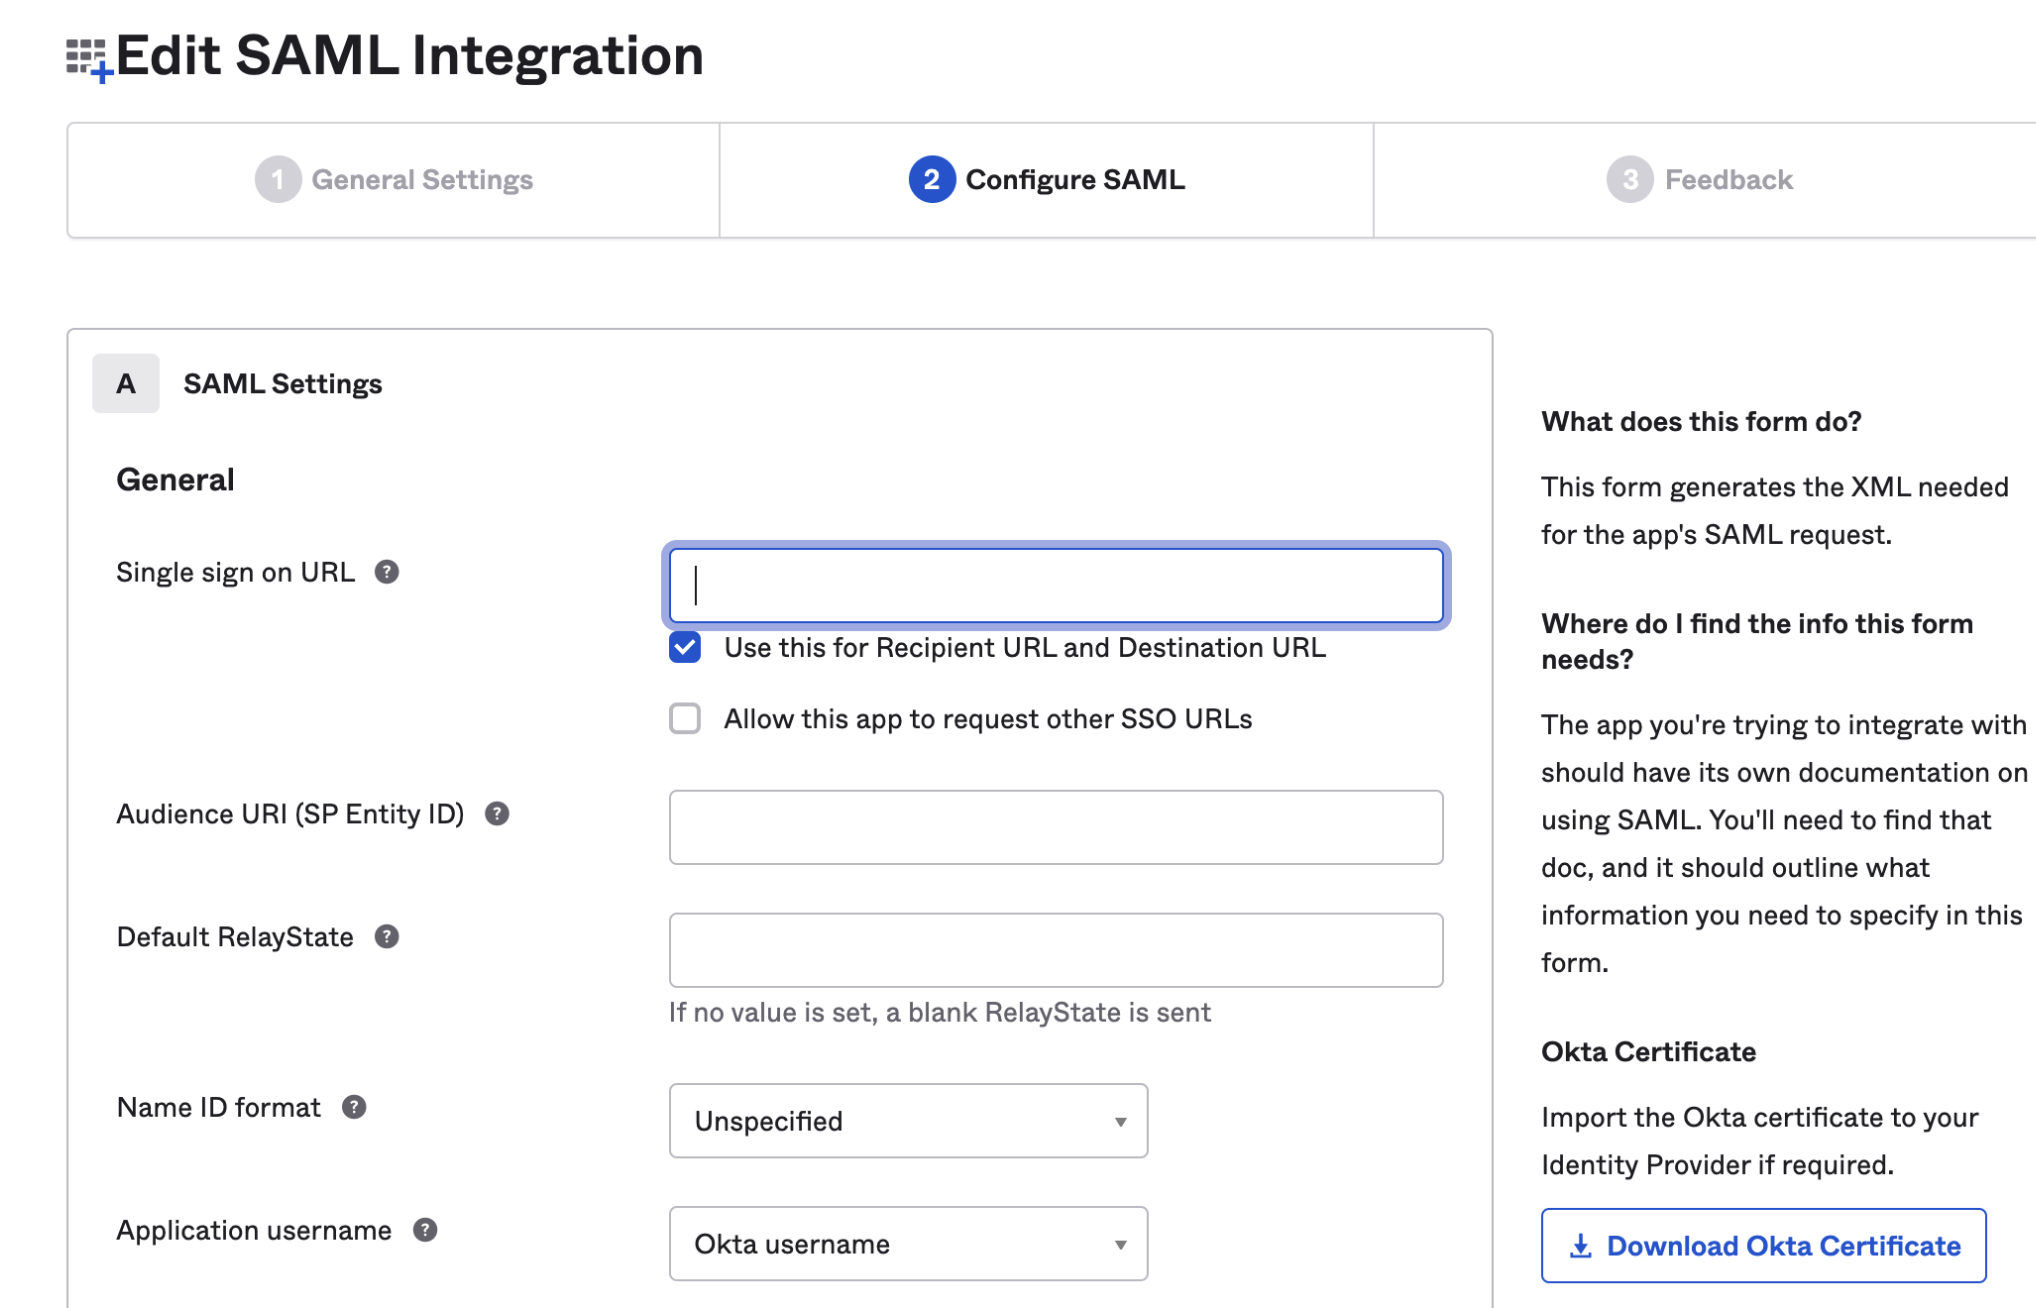
Step 3 - Create a new SAML application on your IDP (below is a sample of OKTA).
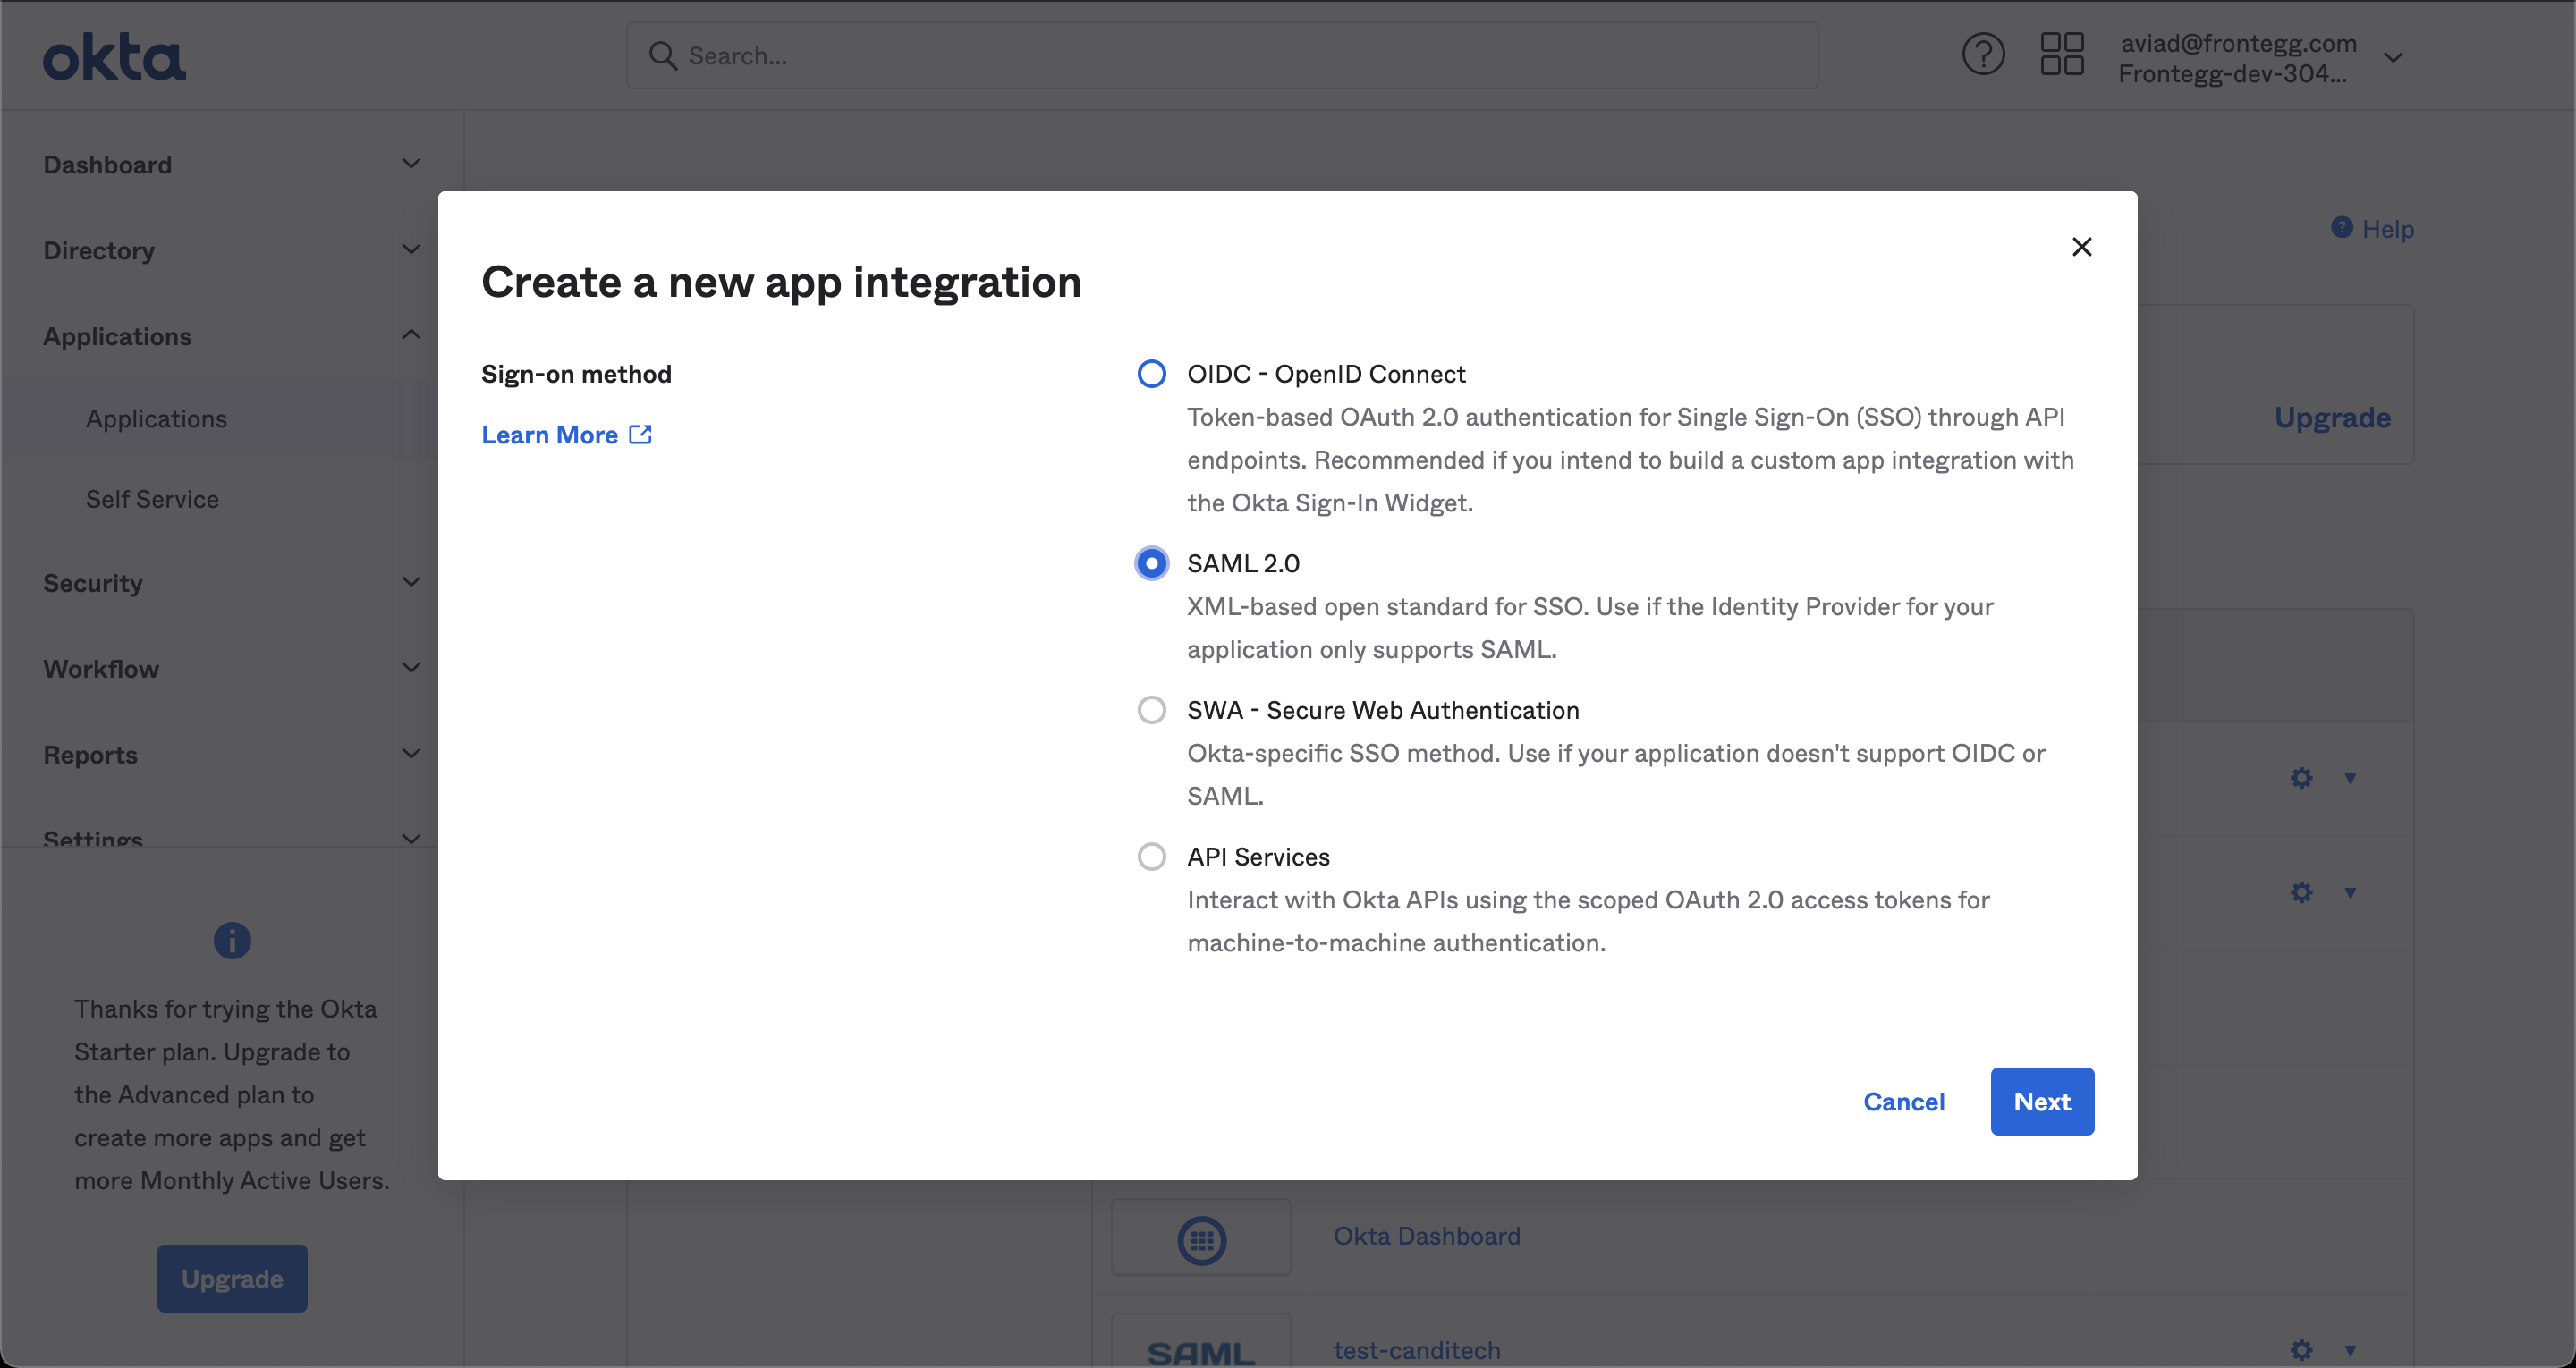
In the SSO URL, enter your subdomain followed by /auth/saml/callback and under SP entity ID include the entity ID defined in Superwise's team management portal.
The next step is to download a metadata XML:
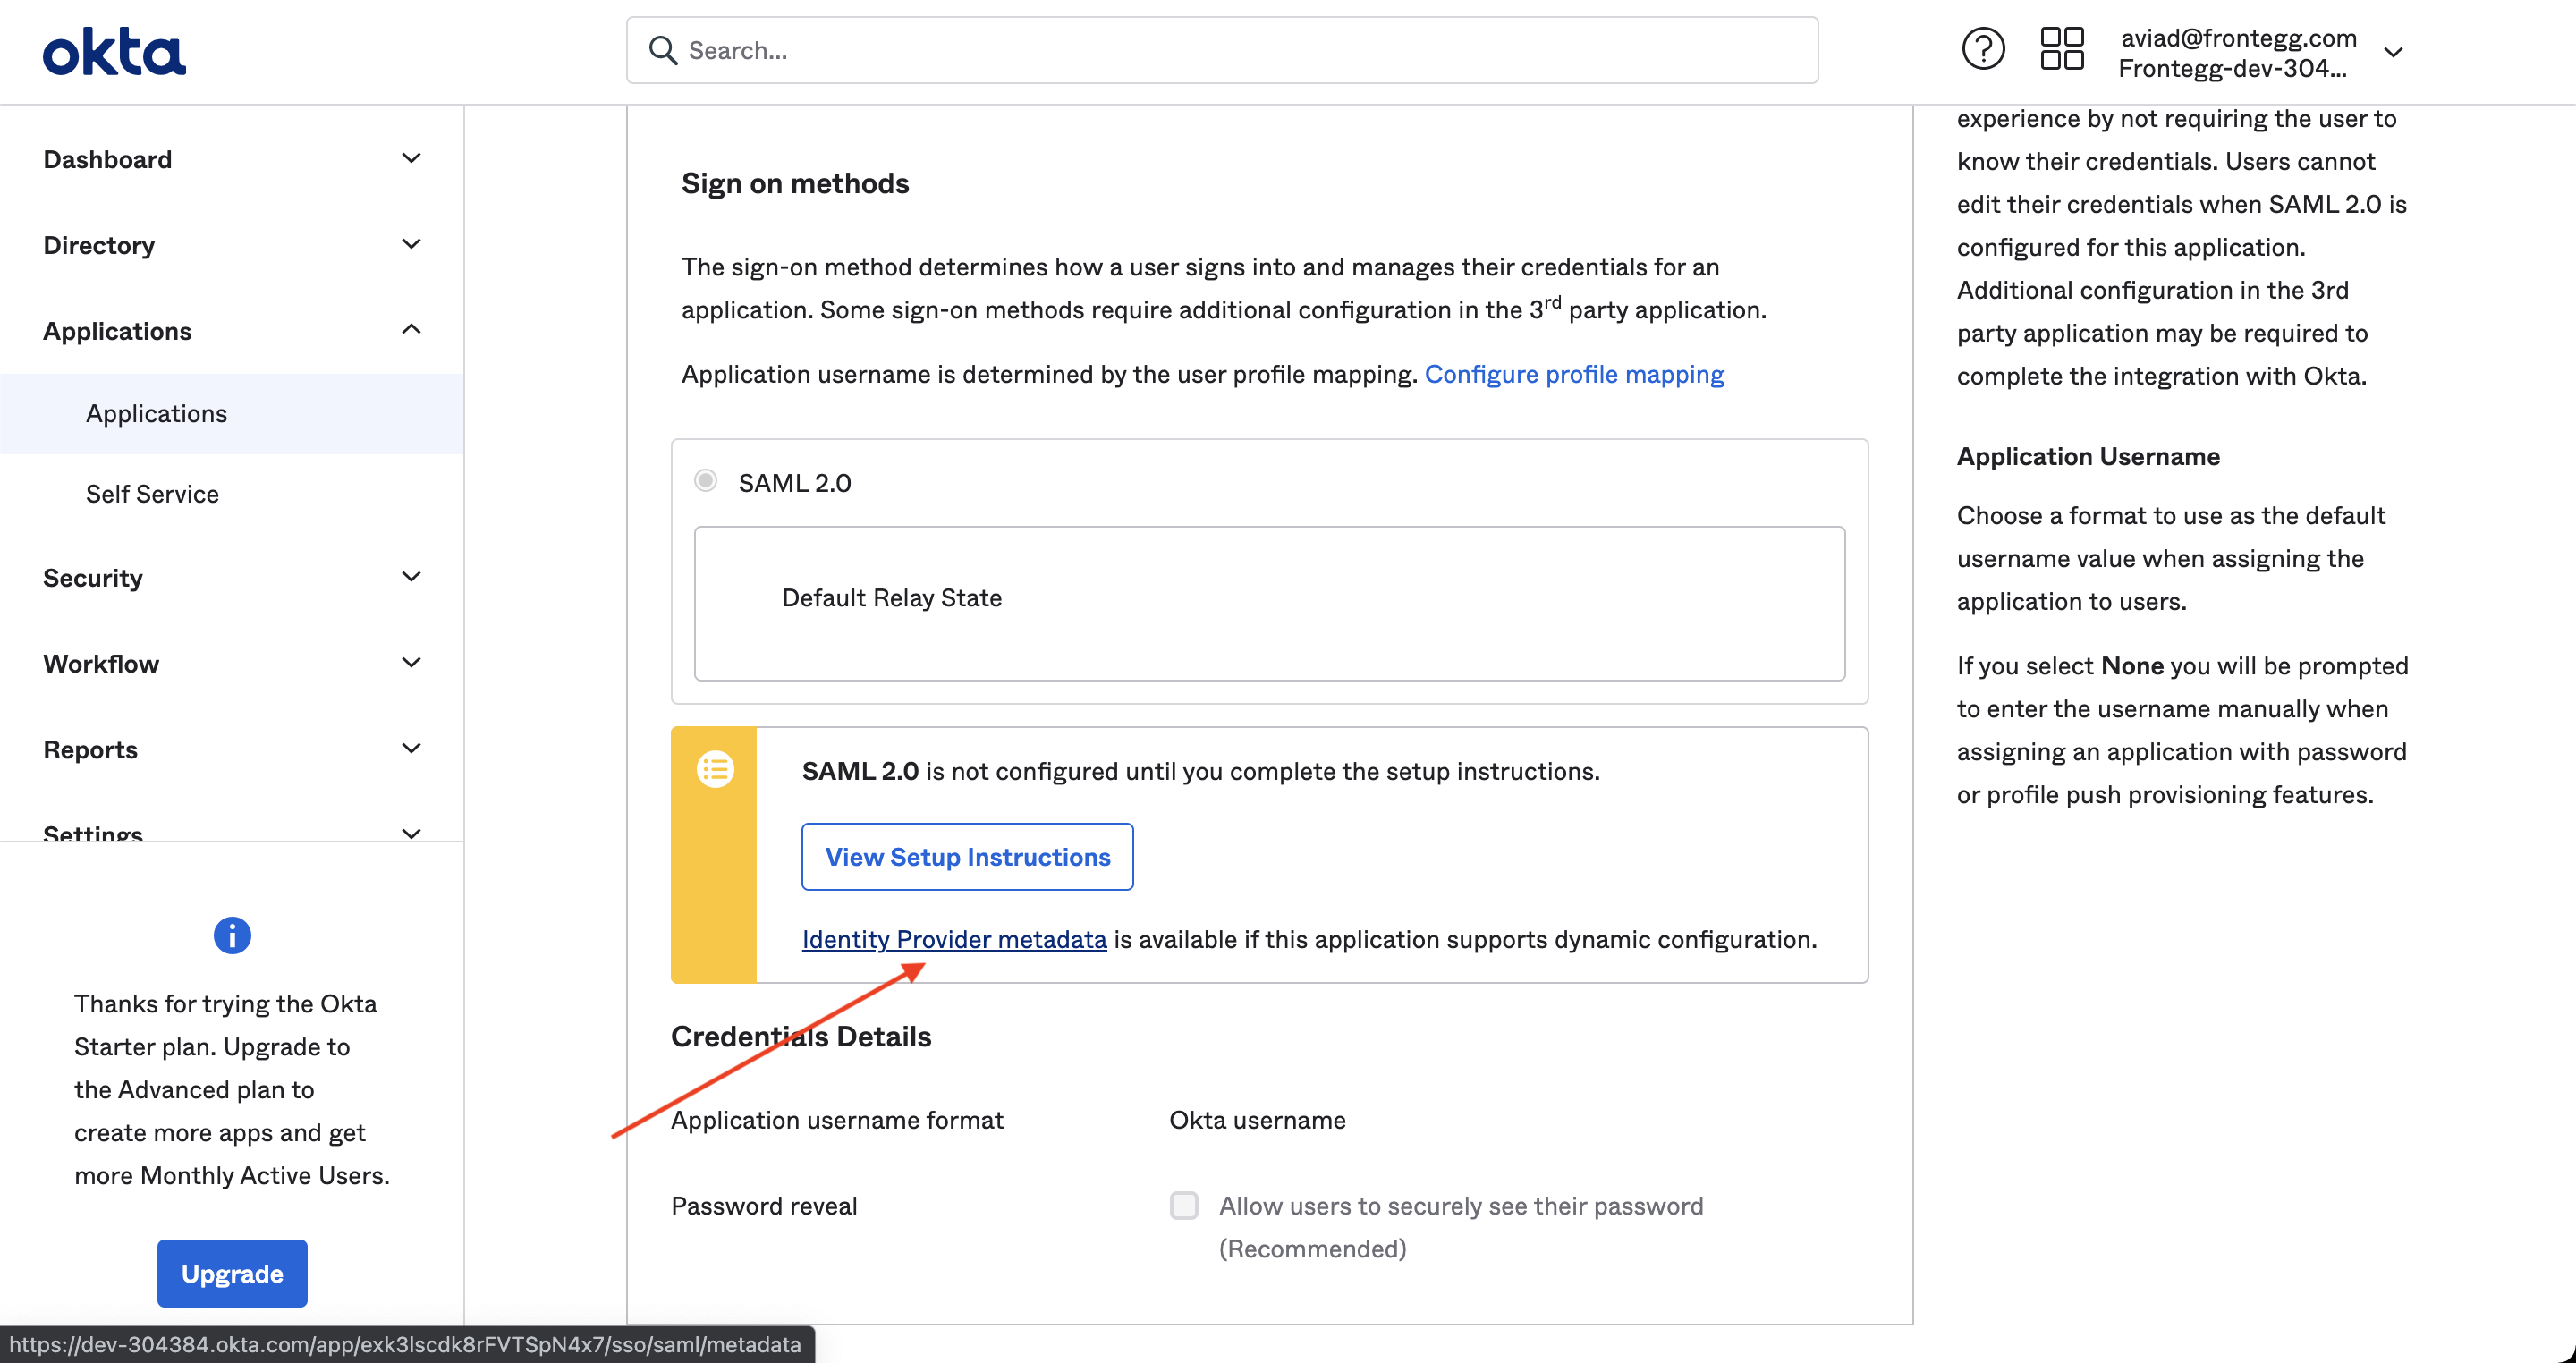
Upload the xml file to the Superwise team management portal (see Step #2) and you should be good to go!
OpenID Connect configuration
Step 1 - Select OpenID Connect
Once you are logged in into the platform, open the Admin Portal and navigate to SSO page.
Then, choose Open ID Connect as IDP.
Step 2 - Provide additional data
Next, the user needs to provide additional data to login with OpenID Connect, as described in the table below.
| Configuration | Description |
|---|---|
| Issuer URL | This is a URL that is given by the IDP. This URL provides instructions on how can we communicate with the IDP. If you are unsure you have the right URL, set it in the text input anyway, and we will let you know if it is okay. |
| Client ID | The clientId given by the IDP. This allows the IDP to identify who is requesting to authenticate. |
| Secret Key | The secret key lets us authenticate with the IDP to validate the user who tries to login. It must correspond to the secret key we have for the clientId. |
| Redirect URI | This is a pre-configured value that lets the IDP know where it should return the user after the user is authenticated in the IDP. The redirect URI value must be configured in the IDP itself. |
After completing and saving all the configurations, you should be able to login using the OpenID Connect protocol.
Updated over 3 years ago


